How to Tune Drum Samples
The subject ‘How to Tune Drum Samples’ is underestimated by many. Tuning Drums has a massive impact on the feel and groove of your tracks. I have put together a few techniques that will improve the quality of your mixes.
Even if it becomes a bit too technical for one or the other. Never forget this rule, because it is more important than anything else:
“If it sounds good, it’s good.” (Duke Ellington)
Note frequency
In order to get a professional sounding mix, tools like (multi-band) compressors, (dynamic) EQ’s, saturation, gates, limiters etc. are used.
Of course, these tools are essential. But one of the simpler tips is tuning your percussive parts to getting a great, more complete and consistent mix. This will take the sludge and mud out of your track.
Every single sound is at a specific frequency and has a musical note. So like any other sound/instrument, also the drums (especially Kick, Clap, Snare & Tom) should be in the same key as the one the song was written in.
Here is a note frequency chart to find specific notes:
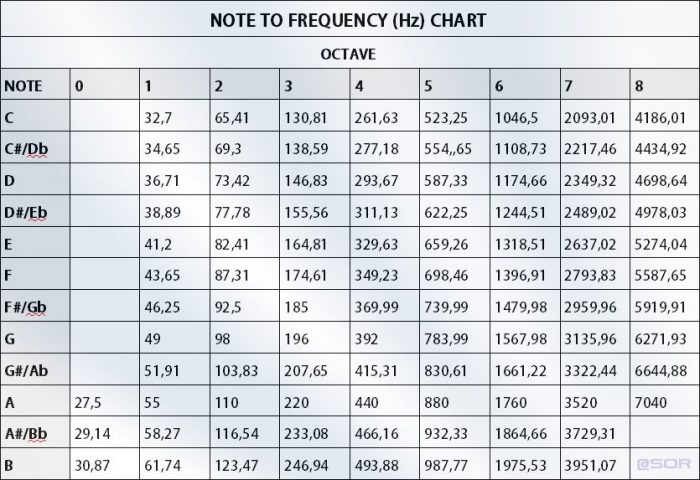
Regardless of which DAW you are using, this note frequency table will help you find the right key for your drums. For example, if your song is in the key of C#, it is advisable to raise the EQ at that frequency. Is your kick drum e.g. at 138 Hz (= C #), boost it here. You can also boost another matching frequency (in a higher octave) to help your drums to stand out in the mix.

Use a Tuner
A tuner (here from Ableton) shows in which note the sound is being played. If the sound is not in the right key, you can adjust it using EQ or pitch-shifting algorithm or speeding up/slowing down the sample until the tuner shows the proper note.
Sometimes e.g. the drum sound is so short that a tuner cannot read the pitch. If this is the case increase the sustain of the kick so that the tuner can work correctly. Then you can transpose it accordingly. If you have trouble tuning your drum elements to the root of the scale you are working with, you can try the other notes of your related scale. For example, if your track is in C major, just use the white keys.
If your DAW doesn’t contain a (good) tuner, I can recommend the frequency analyzer MTuner from Melda Production. To get this resizable plugin you have to install the “MFreeFXBundle”. During the installation, make sure that no Payware plugins are installed. This tool is one of the best tuner you will find.
You can also use the pitch detector in Celemony Melodyne. Feed it a (drum) sample to show the exact note of each hit and tune the same if necessary. VariAudio in Cubase also works precisely and reliably.
Kick Drums
Since the tuning of the kick drum to the root note/song scale is especially important, you should work carefully here. In the bass frequency range, in particular, the frequencies are very close to one another. An example: between 40Hz and 80Hz (range 40) there is 1 octave (12 semitones), as well as between 5000Hz and 10000Hz (range 5000). So you can say that the lower the frequency, the more precisely you have to work.
1. If you can’t discern the original pitch on the kick drum (sometimes Tuners don’t work here), transpose the kick a whole octave or two higher so that it has a more resonant timbre. Don’t bother that the drums sound unnaturally high now. This will make it easier to hear whether or not the drums are in tune. When you have tuned the sound perfectly via pitch, simply transpose the perfectly tuned kick back down. That will keep the tuning intact. Repeat with the rest of your drums.
2. If you like the sound of a kick, but it doesn’t match the key of your track, get more control by splitting your kicks into the frequency regions “Top” and “Tail”. Therefore fade out “Top” after the transient/click and fade in “Tail” (directly after the click) in the other copy. This way tuning the “Tail” to the key of your track without losing the original character of the kick is easy. It’s a simple and clean method.
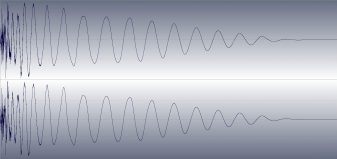
Original Kick
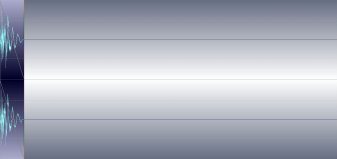
Top (Fade the Tail)
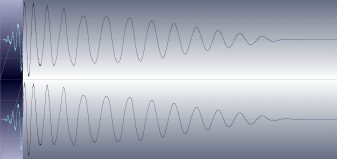
Tail (Fade the Top)
3. It’s always better to shift the kick to the closest possible note, as bigger tonal shifting can introduce artefacts and sound unnatural. Also, the Kick loses power. As e.g. the algorithms in Cubase does not work 100% perfect to my ears (after pitching drum sounds sometimes transients get lost). Therefore I recommend to drop your Kick Sample in a sampler like Groove Agent (Cubase), Kontakt, EXS24 (Logic), Battery etc. and pitch them from there.
With the VSTi D16 Punchbox you can easily tune your kickdrum to musical notes. In my opinion, it’s the best choice for designing top-quality, dancefloor-crushing kicks
Although of course, not all kicks are the same in terms of duration etc., one can mostly say that the sub creates a peak that is higher than any other existing harmonic content. And that is the musical note. You can check this easily with the following analyzers.
Use a Spectrum Analyzer to find the key
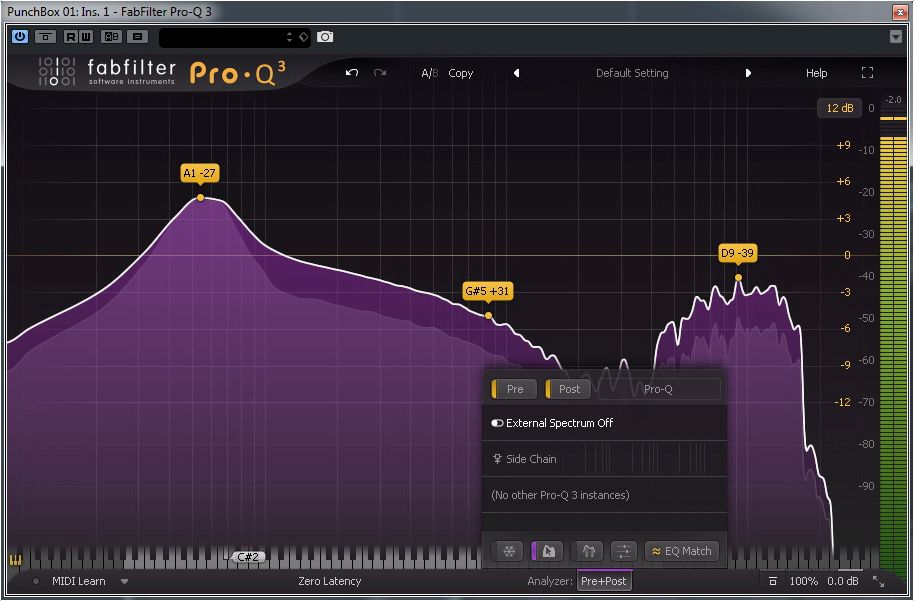
Fabfilter Pro-Q3
Add Fabfilter Pro-Q3 in your effect chain and fire up your drums.
While the piano display is active, parameter value displays that show a band’s frequency will also show that frequency as a musical note. The whole thing works very precisely and completely automatically.
You can even enter frequencies as musical notes: For example, you can double-click on the Frequency knob in the band selection controls and type “D#5 +13”, or “A4” to increase the corresponding frequency to match the scale of your track.
In my opinion, the Pro-Q3 is the most precise tool when it comes to tuning drum samples. It’s my favourite filter!
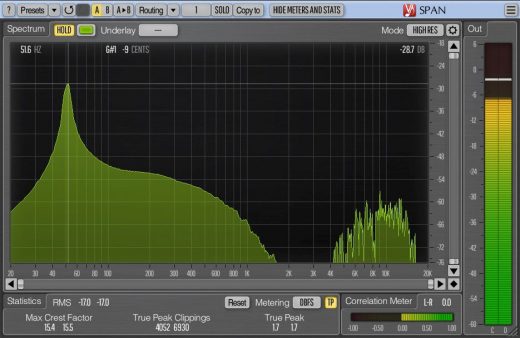
Voxengo SPAN – Spectrum Analyzer (FREE download!)
Add Voxengo SPAN in your effect chain and use it in “High-Resolution Mode”. Then fire up your drum sound and click on “Hold” (next to “Spektrum”) as this allows you to hold spectrum updates temporarily for the purpose of visual comparison.
Now place the mouse pointer to the highest peak (at this point it can get inaccurate) and you see the musical note (incl. +/- semitones). Modify the pitch of your sample (in a sampler) to make it fit perfectly the root note/scale of your song.
Here is a great video from my distribution partner ADSR:
Ableton’s Spectrum Analyser does a good job too. If you want to check a specific range, switch off “Auto” and determine the range that you want to take a closer look at (e.g. Bass Freq.). To get a detailed look switch “Block” to the highest setting (=16384).
Honourable Mentions
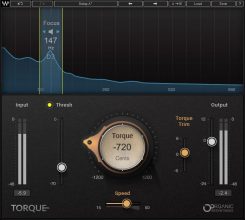
Waves Torque
In my opinion, Torque works incredibly well!
The re-tuning of drums is much more transparent and realistic than with conventional pitch shifting. The plugin is quick and easy to use. And what is certainly not the case with all pitch-shifting tools – the transients are also retained – even with extreme settings.
The ability not to have to change the most distinctive pitch of a sample without changing its overall tone by resampling is breathtaking. Also, Field Recordings can be easily adjusted afterwards. Highly recommended!
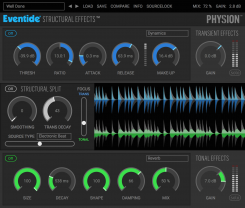
Eventide Physion
Physion splits audio into “Transient” and “Tonal” components. You can re-shape a sound by soloing these components. Add easily various effects to the two element of your sample.
Six transient effects such as Delay, Tap Delay, Dynamics, Phaser, Reverb, Gate + EQ as well as seven Tonal effects such as Delay, Compressor, Pitch, Chorus, Reverb, Tremolo and EQ are available. Physion is easy to use and can achieve both subtle and extreme effects.
Kilohearts Resonator
If you want to emphasize a frequency, Resonator sounds interesting. Specific frequency harmonics in the input sound are enhanced and propagated, giving you fine control over the sustain of a tone.
With this plugin, you can e.g. easily adapt a top loop to the song’s root note/scale. Resonator is also included in one of my fav sound design tools: The multiband modular setup Multipass! Give it a try!

I hope you find these tips about how to tune drum samples useful. Feel free to browse through my catalogue with thousands of high-quality drum samples.


